Here is what the cabinet front looked like before:


I found this paintable beadboard wallpaper online and decided to give it a try. My plan was to wallpaper the really grainy, recessed part of the cabinet door facing to give it a better look. The wallpaper was ordered online from Home Depot for about $25 and had free shipping. It arrived a few days later.

Step One:Sand cabinets and wipe them down. I did not sand them much, it just took a few minutes to sand each door. I made sure to sand all parts including the edges along the side and the inside of the doors. I then wiped them down to remove all of the dust with a damp cloth and let them dry.
Step Two:
Prime cabinet for the wallpaper. I put one coat of this wallpaper primer on the recessed part of the cabinet door with a paint brush and let it dry overnight.


Step Three:
With a paint brush or paint sponge/brush, put a good layer of wallpaper glue on the recessed part of the cabinet door.


Step Four:Cut wall paper a few inches longer than needed. ONLY cut horizontal across the wallpaper...I plan on using the side edges to make sure there was a good, clean edge that would allow the paper to be lined up level with the door. Once you place the wallpaper on the side, push the top up into the corner as far as you can on the recessed part of the door and use a box cutter to trim any excess or uneven parts. Do the same across the top and on the other side and bottom. Use a wallpaper seam roller to roll all over to remove any air bubbles. Wipe off any excess glue at the sides with a damp cloth. Let wallpaper dry overnight.
 Step Five:
Paint! I used a small, super fine roller with some good quality Benjamin Moore paint in a satin finish. I used the color "Espresso" for my project, but you can use any color you like. I did about 3 coats of paint - but no primer on mine.
As far as the cabinet base and drawers, remove drawer fronts and sand them. Wipe clean and paint...again about 3 coats did it for me. I did the same with the cabinet base. I did all 3 coats in one day...it did not take long to dry.
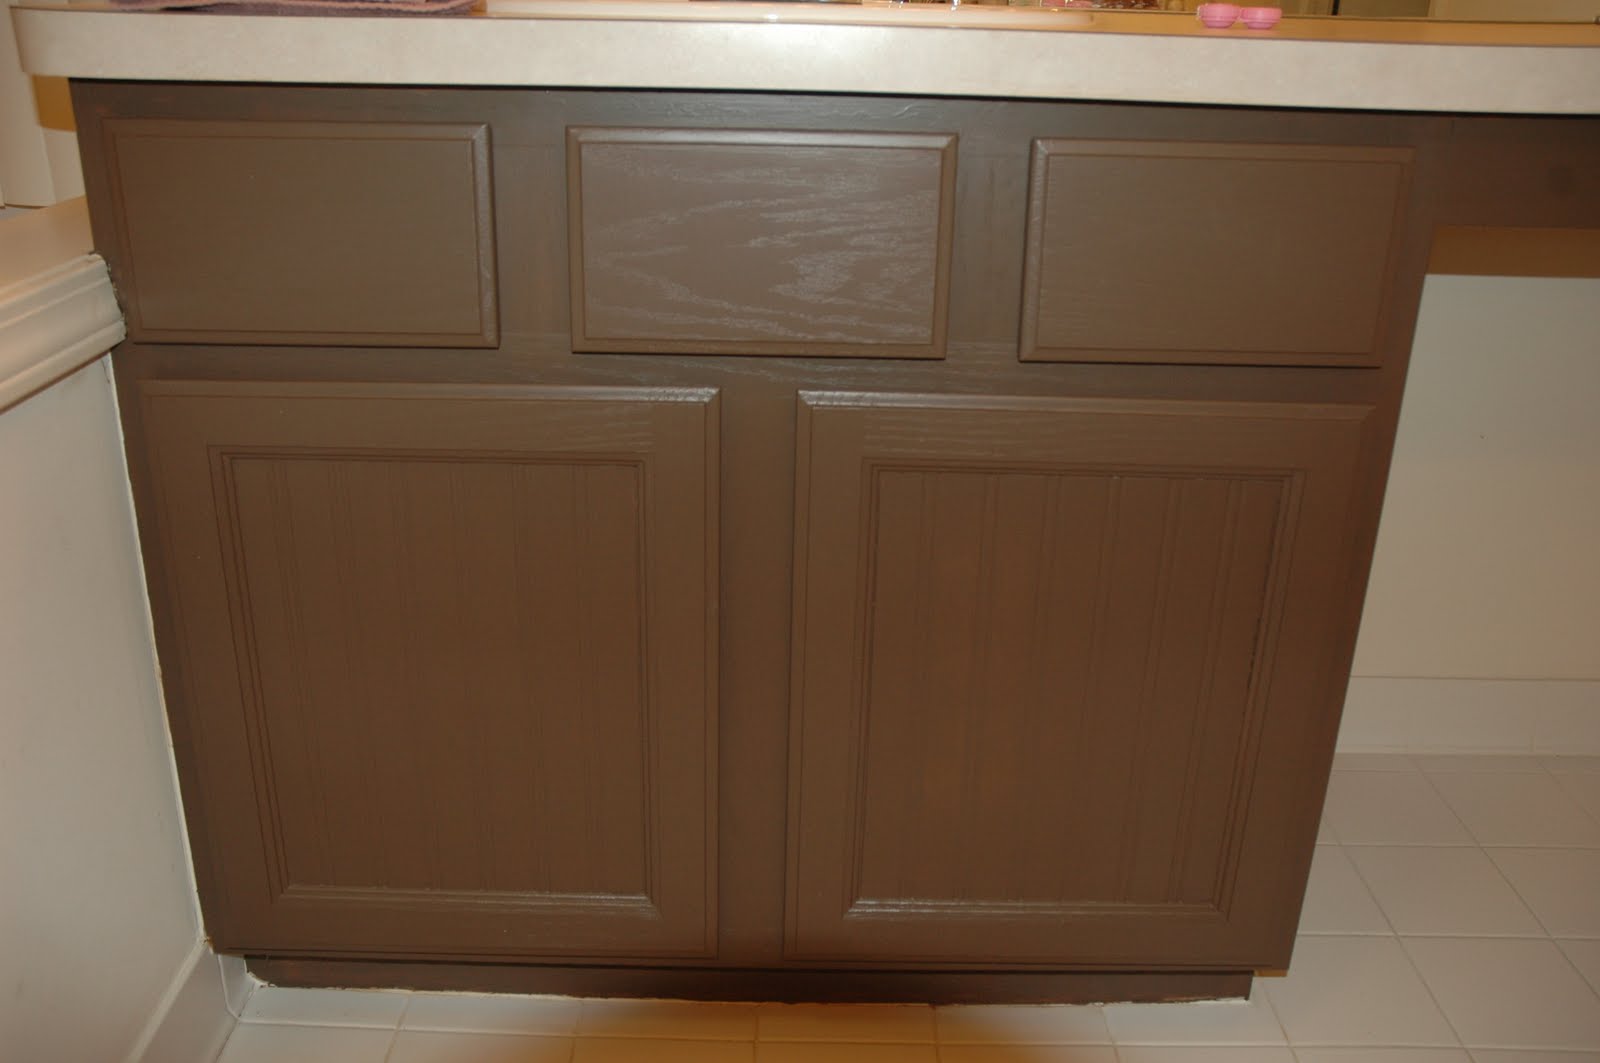
Here is the final result.......drum roll please! :)

 This is just the first step in my ugly master bath mini makeover. Stay tuned for the next steps to master bath beauty!
My advice...go for it. I had NO idea if this would work or how it would look and I am completely pleased with the results. All of the supplies cost me about $100. I have enough stuff leftover that I can do the same thing with our guest bath - for that all I need is one quart of white paint so it will cost hardly anything. So essentially for about $115 I will have done both bathrooms. All I have to do now is get some nice cabinet pulls and it will be complete. I hope this inspires you to try something new and have some confidence that it will come out great!
Looks great! This definitely inspires me to work on my own bathrooms.
ReplyDelete